Syzkaller环境配置
Syzkaller内核模糊测试工具环境搭建,简单测试
项目地址:google/syzkaller: syzkaller is an unsupervised coverage-guided kernel fuzzer (github.com)
Install
gcc 6.10 or later;
go 1.20 or later;
C compiler with coverage support
Linux kernel with coverage additions
Virtual machine or a physical device
syzkaller itself
更新apt并安装相关编译器:
sudo apt update
sudo apt install make gcc flex bison libncurses-dev libelf-dev libssl-dev 下载内核源码:
git clone --branch v6.2 git://git.kernel.org/pub/scm/linux/kernel/git/torvalds/linux.git $KERNEL 内核编译常用的配置参数:
#文本对话式,基于命令行的一种配置,其会在命令行一个个询问具体配置选择
make config
#基于图形界面配置
make menuconfig
##将当前系统存在的.config 文件拷贝至源码目录,并询问新符号如何设置
make oldconfig
#将当前系统存在的.config 文件拷贝至源码目录,新符号设为默认值,不提示
make olddefconfig
#基于当前config和加载的模块创建一个配置
make localmodconfig
#基于QT的配置工具
make xconfig
#使用系统中的默认符号值创建一个config
make defconfig
#基于GTK+的配置工具
make gconfig
#为kvm客户内核支持启用其他选项
make kvm_guest.config 进入源码目录:
make olddefconfig 手动在.config文件中添加编译选项(一定去掉原来的注释):
# Coverage collection.
CONFIG_KCOV=y

# Debug info for symbolization.
CONFIG_DEBUG_INFO_DWARF4=y

# Memory bug detector
CONFIG_KASAN=y
CONFIG_KASAN_INLINE=y

# Required for Debian Stretch and later
CONFIG_CONFIGFS_FS=y
CONFIG_SECURITYFS=y

#这个一定要加上
CONFIG_CMDLINE_BOOL=y
CONFIG_CMDLINE="net.ifnames=0" 再次make:
make olddefconfig 编译:
make -j`nproc` 编译好的内核文件夹内应出现:

debootstrap是debian/ubuntu下的一个工具,用来构建一套基本的系统(根文件系统)。生成的目录符合Linux文件系统标准(FHS),即包含了/boot、/etc、/bin、/usr等等目录,但它比发行版本的Linux体积小很多,当然功能也没那么强大,因此,只能说是“基本的系统”。
这里以创建一个Debian Bullseye版本的Linux镜像为例:
sudo apt install debootstrap

mkdir $IMAGE
cd $IMAGE/
wget https://raw.githubusercontent.com/google/syzkaller/master/tools/create-image.sh -O create-image.sh
chmod +x create-image.sh
./create-image.sh 创建好后对应文件夹下应该有一个bullseye.img文件。
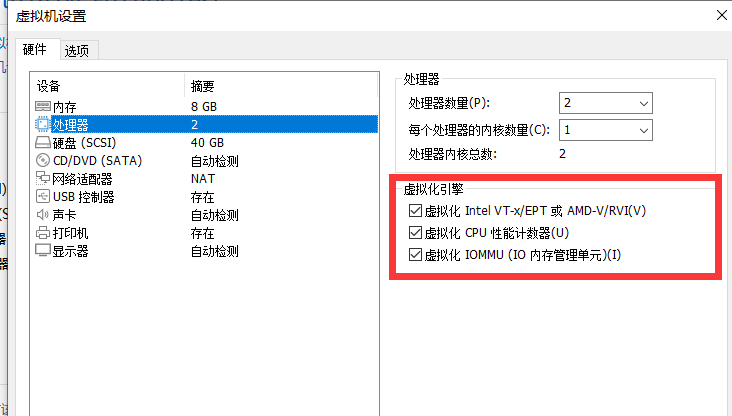
如果Host使用的是虚拟机,需要在设置处开启虚拟化引擎(若是物理机则需要在BIOS上开启):
测试qemu:
qemu-system-x86_64 \
  -m 2G \
  -smp 2 \
  -kernel /home/wx/SyzKaller/linux/arch/x86/boot/bzImage \
  -append "console=ttyS0 root=/dev/sda earlyprintk=serial net.ifnames=0" \
  -drive file=/home/wx/SyzKaller/image/bullseye.img,format=raw \
  -net user,host=10.0.2.10,hostfwd=tcp:127.0.0.1:10021-:22 \
  -net nic,model=e1000 \
  -enable-kvm \
  -nographic \
  -pidfile vm.pid \
2>&1 | tee vm.log 另开一个终端,测试ssh连接:
ssh -i $IMAGE/bullseye.id_rsa -p 10021 -o "StrictHostKeyChecking no" root@localhost 测试完成后就可以关闭qemu(直接poweroff),下面进行syzkaller安装:
安装go:
#如果显示地址不可达
#在站长工具处查询dl.google.com
#找到可以Ping的IP
#修改本机hosts文件即可
wget https://go.dev/dl/go1.20.3.linux-amd64.tar.gz
#如果之前安装过go,一定要先删除原来的
tar -C /usr/local -xzf go1.20.3.linux-amd64.tar.gz
#添加环境变量
export GOROOT=`pwd`/go
export PATH=$GOROOT/bin:$PATH
#测试
go version
#-> go version go1.20.3 linux/amd64 安装syzkaller:
git clone https://github.com/google/syzkaller
cd syzkaller
#安装之前一定要保证gcc和go的版本正确
make
Crash Test
在$linux/fs/open.c文件中的chmod_common()添加一段代码,使得当连续两次chmod调用的mode参数值为0时会产生空指针解引用异常:
static umode_t old_mode = 0xffff;
    if (old_mode == 0 && mode == 0) {
        path = NULL;
    }
old_mode = mode; 重新编译Linux内核,设置Syzkaller配置文件如下:
{
	"target": "linux/amd64",
	"http": "127.0.0.1:56741",
	"workdir": "/home/wx/SyzKaller/syzkaller/workdir",
	"kernel_obj": "/home/wx/SyzKaller/linux/",
	"image": "/home/wx/SyzKaller/image/bullseye.img",
	"sshkey": "/home/wx/SyzKaller/image/bullseye.id_rsa",
	"syzkaller": "/home/wx/SyzKaller/syzkaller",
	"enable_syscalls": ["chmod"],
	"procs": 8,
	"type": "qemu",
	"vm": {
		"count": 4,
		"kernel": "/home/wx/SyzKaller/linux/arch/x86/boot/bzImage",
		"cpu": 2,
		"mem": 2048
	}
}enable_syscalls选项表明了仅对其中的系统调用做fuzzing,如果其中的某个系统调用依赖其他调用,syzkaller会提醒你。- 同理,
disable_syscalls选项表明了不对哪些系统调用fuzzing。
执行:
syz-manager --config config.json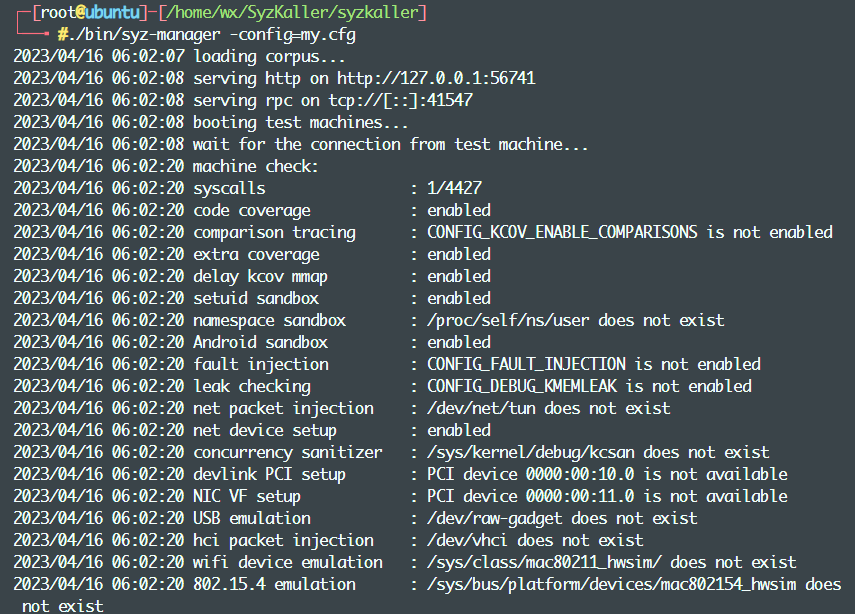
在对应的web127.0.0.1:56741上就可以看到当前fuzzing的情况:
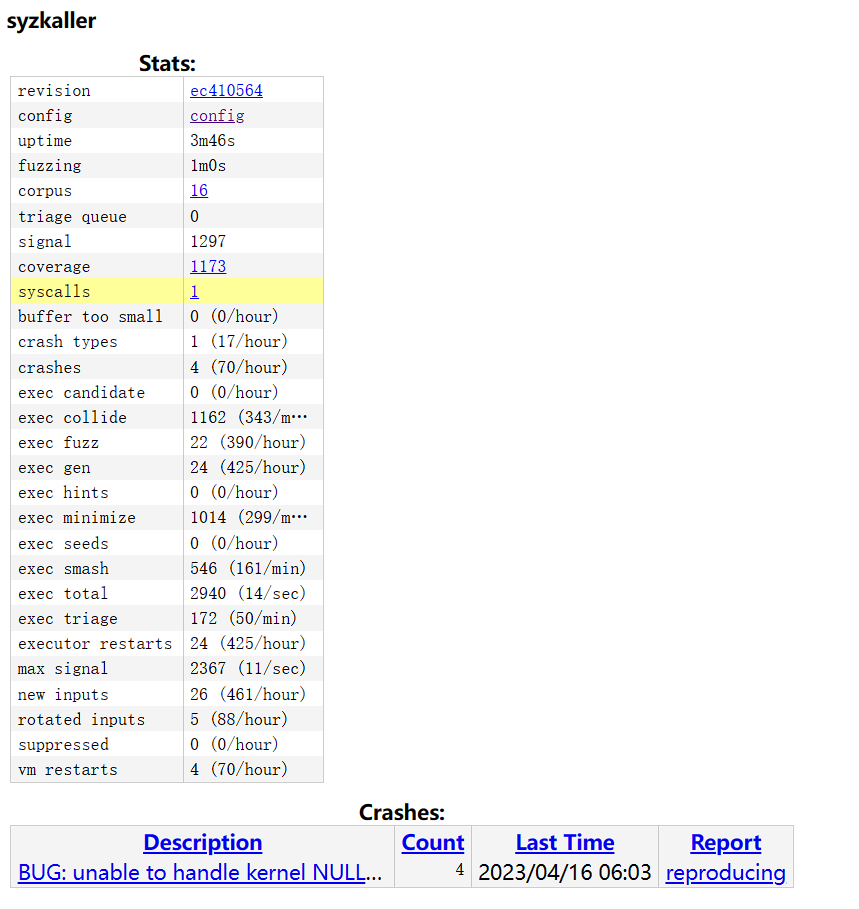
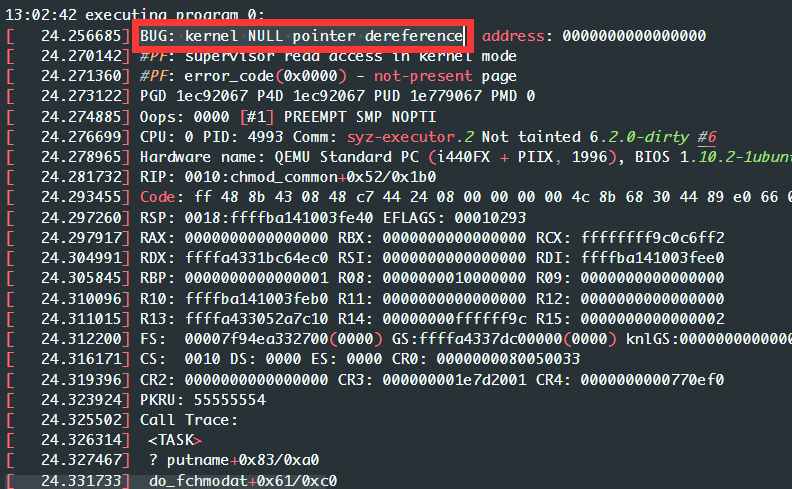
可以看到已经抓到了一个内核Crash:

Using syzkaller, part 2: Detecting programming bugs in the Linux kernel (collabora.com)这个Blog详细说明了网站里各个模块的作用。
查看报告:
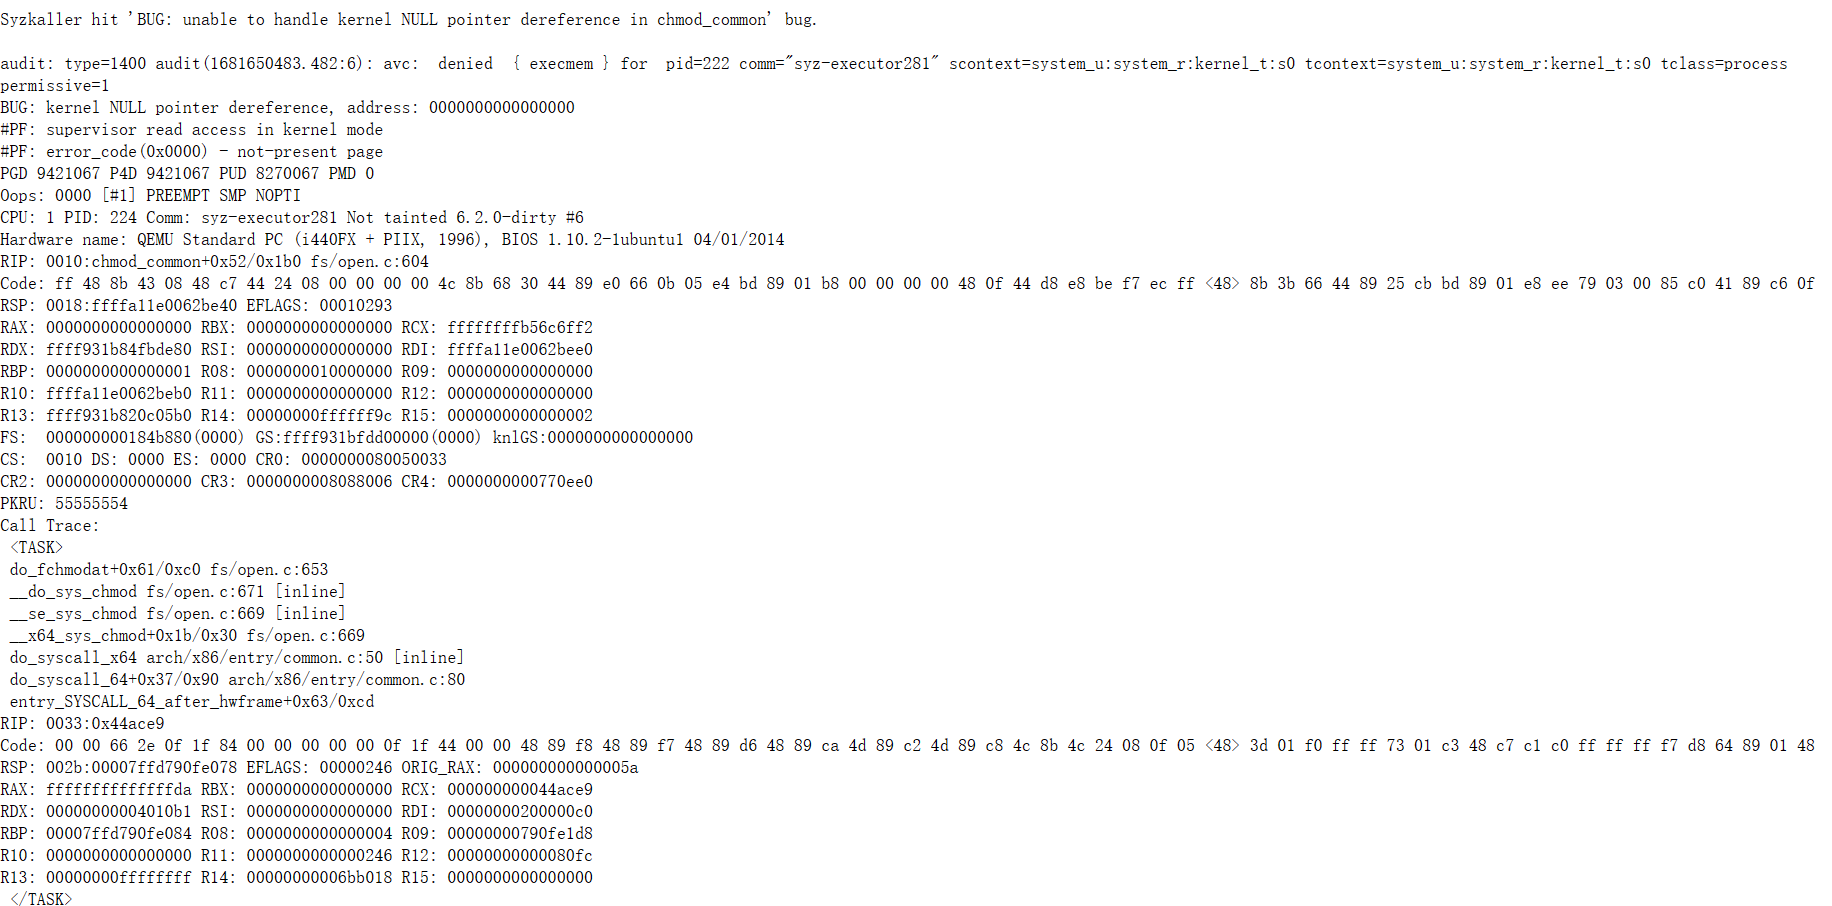
打开目录workdir/carsh/···/log0:
Problem Summary
问题1:在使用ssh连接qemu时无法连接,报错:
“ssh_exchange_identification: Connection closed by remote host”
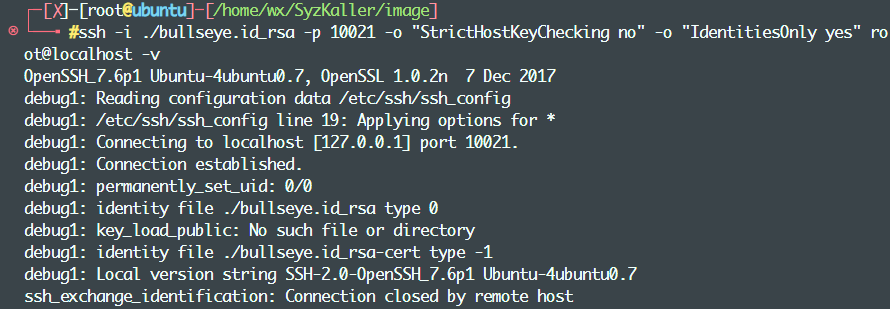
解决方法:
查看QEMU虚拟机内sshd服务状态,发现其服务没有开启:

尝试使用命令service sshd start,无效。
尝试google,发现如下帖子:ssh : Why sshd does not start on qemu booting (google.com)
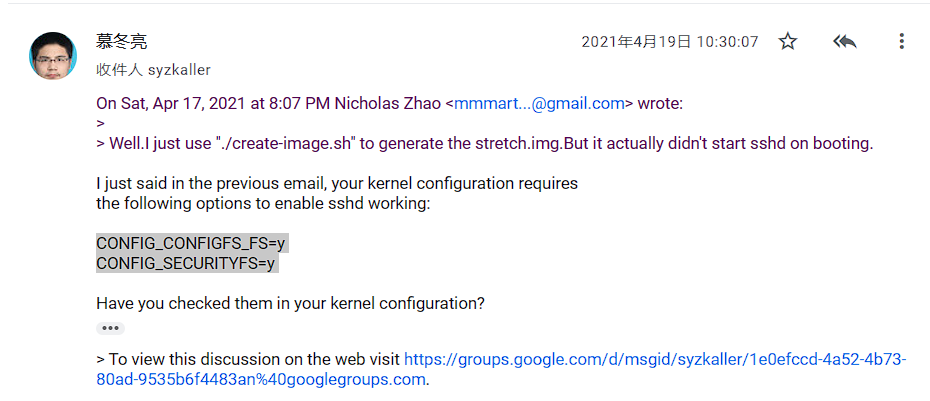
故重新检查linux源码的config后发现,由于手动修改后没有删除原来对应的“xxx not set”注释,导致当时的修改在后续make olddefconfig时又被改回去了。
重新修改.config文件,重新编译,创建qemu虚拟机,再次尝试登陆:
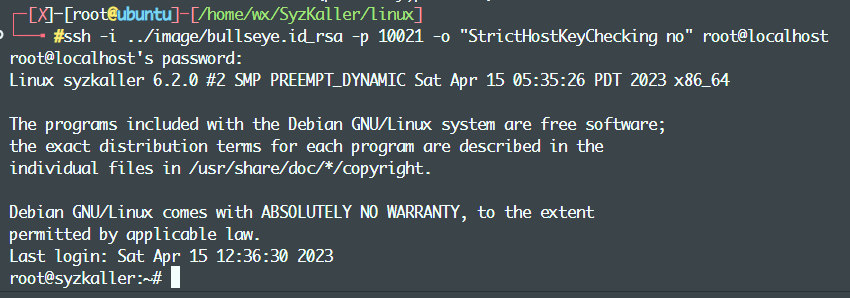
这里的问题其实就出现在没有去掉注释,在.config文件中注释也会被扫描分析。
问题二:sshd服务错误定位
解决方法:
/usr/bin/sshd -T命令可以显示出sshd配置文件的错误之处;- 在ssh连接时使用命令-v/-vv可以查看调试信息
问题三:开启syzkaller后一直没有虚拟机连接
解决方法:在使用命令
./bin/syz-manager -config=my.cfg后面加上-debug,查看调试信息后发现qemu虚拟机显示”Failed to start Raise network interfaces“,查找官方文档后发现需要在内核config上加上:CONFIG_CMDLINE_BOOL=y CONFIG_CMDLINE="net.ifnames=0"
Reference
- google/syzkaller: syzkaller is an unsupervised coverage-guided kernel fuzzer (github.com)
- syzkaller/setup.md at master · google/syzkaller (github.com)
- How to set up syzkaller (googlesource.com)
- ssh : Why sshd does not start on qemu booting (google.com)
- Debian-GNU-Linux-Profiles/test.c at master · hardenedlinux/Debian-GNU-Linux-Profiles (github.com)
- Syzkaller Fuzz Android Kernel | BruceFan’s Blog (pwn4.fun)
